
Picture this — you finally have a free Saturday morning to tend to your garden. The sun is warm, the birds are chirping, and your tomato plants are practically begging for attention. But instead of pruning your roses or planting those tulip bulbs you bought last week, you’re knee-deep in your shed, digging through a chaotic pile of rusty shovels, tangled hoses, and misplaced trowels. Sound familiar?
Table of Contents
If you’ve ever lost twenty minutes hunting for your pruning shears (only to find them buried under a bag of soil), you already know the frustration. Gardening is supposed to be therapeutic, not a scavenger hunt. That’s exactly why building your own garden tool organizer might just be the weekend project that changes everything.
In this guide, you’ll learn how to plan, build, and maintain a DIY garden tool organizer that saves you time, money, and sanity. Whether you’re a seasoned gardener or a weekend warrior, this project is easier than you think — and the payoff is huge.
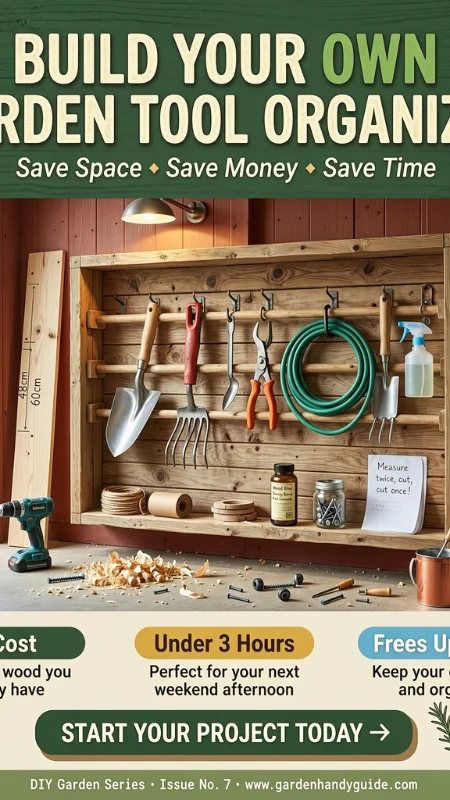
Why You Need a Garden Tool Organizer (And Why DIY Is the Best Choice)
Let’s be honest — a disorganized shed doesn’t just look messy. It actively steals your time, damages your tools, and drains your enthusiasm for gardening. A dedicated garden tool organizer solves all three problems at once.
Here’s why building your own beats buying one off the shelf:
- You save serious money. Pre-made organizers can run $150 or more. A DIY version costs a fraction of that.
- Your tools last longer. Properly stored tools don’t rust, warp, or get stepped on.
- You get exactly what you need. No more forcing your rake into a slot designed for a broom.
- It’s eco-friendly. Repurposing pallets, scrap wood, or old PVC pipes keeps materials out of landfills.
- It feels amazing. There’s something deeply satisfying about building something with your own two hands.
Benefits of a DIY Garden Tool Organizer at a Glance
- ✅ Budget-friendly (under $110 total)
- ✅ Customizable to your exact space
- ✅ Sustainable and eco-conscious
- ✅ Rewarding weekend project
- ✅ Adds value to your shed or garage
Tools and Materials You’ll Need to Build Your Garden Tool Organizer
Before you start swinging a hammer, gather everything you need. Nothing kills momentum like realizing halfway through that you’re out of screws.
You can find most of these materials at your local hardware store, or even better, salvage them from old furniture, pallets, or leftover construction supplies.
Materials & Cost Breakdown Table
| Material | Quantity | Estimated Cost (USD) | Purpose |
|---|---|---|---|
| Plywood (4×8 ft, ¾ inch) | 1 sheet | $35 | Backboard |
| 2×4 Wooden Planks | 4 pieces | $20 | Frame support |
| PVC Pipes (2-inch diameter) | 3 pieces | $12 | Long-handle tool holders |
| Wall Hooks (heavy-duty) | 10 | $15 | Hanging tools |
| Wood Screws | 1 box | $8 | Assembly |
| Wood Stain / Paint | 1 can | $12 | Finishing |
| Sandpaper (medium grit) | 3 sheets | $5 | Smoothing edges |
| Total Estimated Cost | — | ~$107 | — |
Tools You’ll Need
- Drill and drill bits
- Measuring tape
- Level
- Saw (hand saw or circular saw)
- Screwdriver
- Pencil for marking
- Safety goggles and work gloves
Don’t skip the safety gear. Even a small splinter or a stray screw can turn your fun project into an emergency room visit.
Planning Your Garden Tool Organizer Design
The best garden tool organizers aren’t just thrown together — they’re planned. Spending 30 minutes on planning can save you hours of frustration later.
Start by taking inventory of every tool you own. Group them into categories:
- Long-handled tools: rakes, shovels, hoes, brooms
- Small hand tools: trowels, pruners, gloves
- Power tools: trimmers, leaf blowers
- Accessories: twine, seeds, gloves, watering cans
Next, measure your available wall space. Grab a pencil and sketch a rough layout on paper. If you’re the tech-savvy type, free tools like SketchUp can help you visualize the design in 3D.
Popular Design Styles to Consider
- Pegboard Organizer – Perfect for small hand tools and endlessly customizable.
- Pallet Wall Organizer – Rustic, cheap, and beginner-friendly.
- PVC Pipe Rack – Ideal for holding shovels, rakes, and hoes upright.
- Rolling Cart Organizer – Great if you like to move your tools around the yard.
Pick a style that matches your space, budget, and skill level. If this is your first build, the pegboard or pallet designs are the easiest to pull off.
Step-by-Step Guide to Building Your DIY Garden Tool Organizer
Now for the fun part — actually building it. Follow these steps and you’ll have a fully functional garden tool organizer by the end of the day.
Step 1 – Prepare Your Workspace
Clear a flat area in your garage, driveway, or backyard. Lay out a tarp to catch sawdust and debris. Arrange your materials and tools within easy reach so you’re not running back and forth.
Step 2 – Cut the Plywood Backboard
Measure and mark your plywood to your desired dimensions. A 4 ft x 3 ft board works well for most sheds. Cut carefully using a hand saw or circular saw, then sand the edges to prevent splinters.
Step 3 – Build the Frame
Attach the 2×4 planks to the back of the plywood using wood screws. These act as a spacer between the board and the wall, giving you room to install hooks and hardware. Make sure the frame is square before moving on.
Step 4 – Install PVC Pipe Holders
Cut your PVC pipes into 6-inch sections using a hand saw. Screw them horizontally onto the lower portion of the board, spacing them about 6–8 inches apart. Each pipe will hold one long-handled tool — perfect for rakes, shovels, and hoes.
Step 5 – Add Hooks and Shelves
Space your heavy-duty hooks evenly across the upper section of the board. Use a measuring tape to keep everything symmetrical (your eyes will thank you later). For bonus storage, add a small shelf on top to hold gloves, seed packets, twine, or small pots.
Step 6 – Paint or Stain for Weather Protection
If your organizer will live in a damp shed or outdoors, weatherproofing is non-negotiable. Apply exterior paint or a weatherproof wood stain. Let it dry for at least 24 hours before hanging tools on it.
Step 7 – Mount to the Wall
This is where a lot of DIYers get lazy — don’t be one of them. Locate the wall studs using a stud finder, then use heavy-duty anchors and screws to secure the organizer. Use a level to make sure it’s perfectly straight. A crooked organizer will drive you crazy every time you walk into your shed.
Creative Garden Tool Organizer Ideas for Every Space
Not every gardener has a spacious shed. If you’re working with a tight balcony, small garage, or narrow patio, here are some creative garden tool organizer ideas that make the most of every square inch.
Space-Saving Organizer Ideas
- Vertical Pallet Organizer – Lean or mount a pallet against the wall and slot your tools between the slats.
- Magnetic Strip Rack – A magnetic knife strip works wonders for metal hand tools like pruners and trowels.
- Repurposed Ladder Shelf – An old wooden ladder becomes a charming, tiered storage unit.
- Mason Jar Wall Storage – Attach jar lids to the underside of a shelf, then screw jars into place for seeds, screws, and tiny accessories.
- Over-the-Door Shoe Organizer – A canvas shoe organizer with pockets is perfect for gloves, small tools, and gardening gadgets.
Mix and match these ideas to create a hybrid setup that works for your unique space.
Pro Tips to Maintain Your Garden Tool Organizer
Building your organizer is only half the battle. Keeping it functional and looking great over the years takes a little upkeep — but not much.
- Clean tools before hanging them. Dirt and moisture speed up rust.
- Reapply wood sealant annually. This protects against humidity and temperature swings.
- Label sections. Masking tape or a label maker helps you (and family members) put things back where they belong.
- Reorganize seasonally. Move summer tools to the front in warm months, and winter tools during colder seasons.
Quick Maintenance Checklist
- 🧽 Wipe tools with a dry cloth after every use
- 🛢️ Oil metal parts once a month
- 🎨 Repaint or restain every 1–2 years
- 🔩 Tighten screws and hooks quarterly
Ten minutes of maintenance every few months will keep your garden tool organizer looking brand new for years to come.
Common Mistakes to Avoid When Building a Garden Tool Organizer
Even the most enthusiastic DIYers make rookie mistakes. Here’s what to watch out for:
- Using untreated wood outdoors. It’ll warp, rot, and fall apart within a season.
- Overloading hooks beyond their weight capacity. Always check the weight rating before hanging heavy tools.
- Poor wall anchoring. Skipping the stud finder or using cheap anchors leads to disaster.
- Ignoring tool weight distribution. Heavier tools should always be mounted lower to prevent tipping.
- Skipping the sanding step. Rough edges cause splinters and snag your gloves.
Avoid these pitfalls and your organizer will serve you well for many gardening seasons.
Conclusion – Transform Your Shed with a DIY Garden Tool Organizer
At the end of the day, a DIY garden tool organizer isn’t just about tidiness — it’s about reclaiming your love for gardening. When your tools are easy to find, easy to grab, and easy to put away, you spend less time stressing and more time doing what you actually love: growing beautiful things.
You don’t need to be a master carpenter to pull this off. Start small, follow the steps, and don’t stress about perfection. Your first version doesn’t have to be flawless — it just has to work. Over time, you can add features, refine the design, and even build multiple organizers for different tool categories.
So here’s your challenge: grab your tools, roll up your sleeves, and start building your dream garden tool organizer this weekend. Your future self — the one calmly picking up a clean pair of pruners on a sunny Saturday morning — will thank you.
Ready to get started? Bookmark this guide, share it with a fellow gardener, and drop a comment below with your favorite organizer idea. We’d love to see your finished project!
FAQ – Frequently Asked Questions About DIY Garden Tool Organizers
1. What is the cheapest way to build a DIY garden tool organizer?
The cheapest route is using recycled materials like old pallets, scrap wood, or leftover PVC pipes. If you have a hammer, some nails, and a free pallet from a local hardware store, you can build a functional garden tool organizer for under $20.
2. How long does it take to build a garden tool organizer at home?
Most DIY garden tool organizers can be built in 3–5 hours, depending on the complexity of your design. Simpler projects like pegboards or pallet mounts can be finished in an afternoon.
3. What is the best wood for a garden tool organizer?
Cedar and pressure-treated pine are the best choices because they naturally resist moisture, pests, and rot. Both are great for outdoor use and hold up well in humid sheds.
4. Can I build a garden tool organizer without power tools?
Absolutely. A hand saw, screwdriver, and hammer are more than enough for most basic designs. Power tools just make the process faster and easier.
5. How do I hang a heavy garden tool organizer on the wall?
Always mount your organizer into wall studs using heavy-duty anchors, screws, and a level. This prevents it from pulling away from the wall under the weight of your tools.
6. What’s the best garden tool organizer for a small shed?
A vertical pegboard or pallet-based garden tool organizer works best for small sheds because it maximizes wall space without eating up valuable floor area. Add hooks and small shelves for extra versatility.
🌱 Now it’s your turn. Which design are you going to build first — the classic pegboard, the rustic pallet, or a hybrid of your own creation? Let us know in the comments and share this guide with anyone who dreams of a clutter-free garden shed!