
If you’ve ever planted a hopeful handful of seedlings only to watch them struggle in stubborn soil, you already know the quiet frustration that can come with gardening. Maybe your ground stays soggy after rain. Maybe it bakes hard in summer. Or maybe you’re working with a small yard, a patio, or a thin strip beside the driveway and you’re tired of being told you “need more space.”
Table of Contents
You don’t. You need a better setup.
Making a raised garden bed is one of the most practical ways to take control of your growing conditions—without waiting years for your native soil to improve. You create a defined space, fill it with soil that actually supports roots, and build a structure that keeps producing season after season. The best part? You can scale it to your life: one small bed today, more beds later, or a single deep bed designed for long-term harvests.
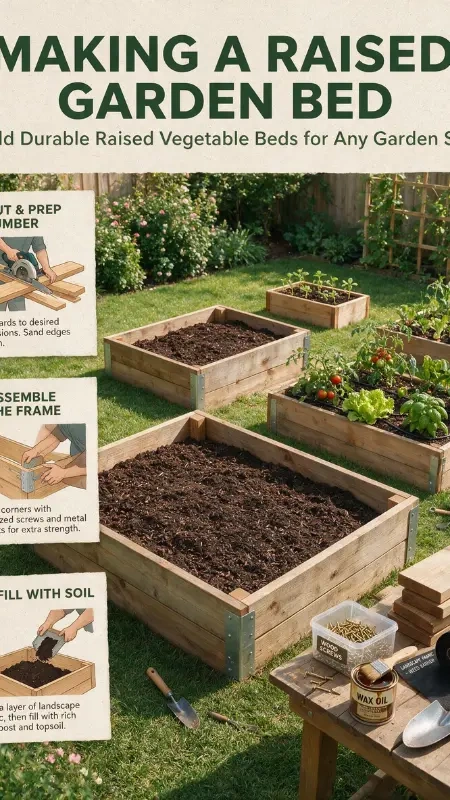
This guide walks you through planning, building, and maintaining durable raised vegetable beds—whether you’re gardening in a compact urban corner or laying out a full backyard kitchen garden.
Why Raised Vegetable Beds Work (and Why Durability Matters)
Raised beds aren’t a trend. They’re a solution—especially when your native soil, space, or time is working against you.
Benefits you’ll notice right away
- Better drainage and fewer root problems: Raised beds shed excess water more easily than compacted ground. Your plants get oxygen at the roots, not rot.
- Earlier planting in spring: Soil in raised beds typically warms faster than in-ground soil, which can help you start sooner in many climates.
- Cleaner harvests and fewer weeds: A defined bed means you can smother existing weeds and keep new ones from taking over.
- Easier on your body: When the bed is the right height and width, you spend less time bending and less time fighting the soil.
- More reliable yields in poor soil: When you control the soil mix, you control a major piece of the harvest puzzle.
Many Cooperative Extension services recommend raised beds for problem soils (heavy clay, shallow topsoil, poor drainage) and for gardeners who want more control over soil structure and amendments.
What “durable” means in a raised bed
A raised bed fails when the sides bow out, the corners loosen, or the boards rot quickly. Durability comes from:
- rot-resistant materials (or smart design choices that reduce rot)
- strong corners and bracing
- the right fasteners
- airflow and water management that don’t trap moisture against wood
If you build it once and build it well, you won’t be rebuilding every other year.
Planning Your Raised Bed: Size, Location, and Layout
Before you buy wood or start digging, plan the bed around how you’ll actually use it.
Choose the best location for your raised garden bed
Aim for:
- 6–8 hours of sun for most fruiting vegetables (tomatoes, peppers, cucumbers). Leafy greens can tolerate less.
- Easy access to water. If the hose barely reaches, you’ll feel it by July.
- Good airflow to reduce mildew and fungal pressure.
- A spot you’ll see often. If you walk past it daily, you’ll catch problems early.
If your yard is sloped, you can still build a raised bed. You’ll either:
- level the site by removing soil from the high side, or
- terrace the slope and let one side of the bed sit slightly higher (with extra bracing)
Raised bed dimensions that fit your space
Use these practical guidelines:
Width (most important):
- 3–4 feet wide max if you can access both sides
- 2 feet wide if the bed is against a wall or fence
This keeps you from stepping into the bed, which compacts soil and hurts root growth.
Length:
- 4–8 feet is common and manageable
- If you go longer than 8 feet, plan for center bracing so the sides don’t bow
Depth:
- 10–12 inches: lettuce, spinach, many herbs
- 12–18 inches: most vegetables
- 18–24 inches: deep-root crops (carrots/parsnips) or if your native soil is terrible and you want full separation
Don’t forget your paths
Good paths make gardening feel easy instead of crowded.
- 18–24 inches wide: comfortable for one person
- 30–36 inches wide: better if you want a wheelbarrow
Path materials that work well:
- wood chips or shredded mulch
- gravel (great for drainage, less fun to kneel on)
- cardboard + mulch (cheap and effective)
Best Materials for Making a Raised Garden Bed That Lasts
Your material choice is a balance between cost, lifespan, and the look you want.
Wood options (popular and beginner-friendly)
- Cedar or redwood: Naturally rot-resistant and long-lasting. More expensive, but often worth it if you want longevity.
- Pine/fir: Budget-friendly and widely available. It can last several years, especially if you build with thicker boards and good airflow.
- Untreated hardwoods: Sometimes available locally; lifespan varies.
A note on pressure-treated wood and vegetable gardens
Modern pressure-treated lumber in the U.S. is typically treated with copper-based preservatives (not the older CCA formulas phased out for most residential uses). Many gardeners use it successfully. If you prefer extra peace of mind, you can:
- line the inside with a permeable barrier (not plastic that traps water), or
- choose naturally rot-resistant wood instead
When in doubt, check guidance from your local Cooperative Extension or environmental agencies for current recommendations.
Metal, stone, and composite
- Galvanized metal beds: Long-lasting and neat-looking. In very hot climates, metal can heat up faster—mulch helps protect soil moisture.
- Stone or brick: Extremely durable and attractive, but heavier labor and often more expensive.
- Composite boards: Rot-resistant, low maintenance. Look for products rated for garden use.
Fasteners and hardware that keep beds tight
Use:
- exterior-grade screws (deck screws are common)
- corner brackets or structural screws at corners
- mending plates for extra reinforcement
- stakes/rebar to anchor beds in windy areas
Avoid building a bed with only nails. Nails loosen over time as wood expands and contracts with moisture changes.
Tools & Supplies Checklist
You don’t need a workshop. You need a basic setup and a plan.
Essential tools
- drill/driver + bits
- measuring tape
- level
- saw (or get boards cut at the store)
- shovel and rake
Supplies
- boards/panels for the frame
- exterior screws + corner braces
- hardware cloth (optional, for rodents)
- cardboard (weed smothering layer)
- soil mix ingredients + compost
- mulch (straw, shredded leaves, or wood chips for paths)
Step-by-Step: Making a Raised Garden Bed That Won’t Warp or Rot
Step 1: Mark and level your site
- Mark the outline with stakes and string.
- Check level in multiple directions.
- Remove sod, or smother it with cardboard (overlapping seams).
If you’re working on grass, cardboard is your friend. Lay it thick, soak it, and cover with soil. It suppresses weeds and breaks down over time.
Step 2: Build a strong frame (square and braced)
- Pre-drill holes to prevent splitting.
- Assemble the rectangle on a flat surface if possible.
- Use corner posts (like 4x4s) or metal brackets for stronger corners.
Add bracing if your bed is long.
For beds longer than 6–8 feet, install a center brace across the width. Soil is heavy, and pressure builds as the bed stays wet and full.
Step 3: Protect the base (optional but smart)
Depending on your pests and location:
- Rodent protection: staple hardware cloth to the bottom before filling (especially if you have gophers/voles).
- Weed suppression: lay cardboard under the bed area.
- Drainage: don’t put plastic under the bed—water needs to move.
Step 4: Decide on a liner (only if it helps)
A liner can be useful if:
- you’re using treated lumber and want a barrier
- your boards are thin and you want to reduce soil contact
If you line the bed, use something permeable so water doesn’t get trapped against wood.
Step 5: Fill with a real raised bed soil mix
This is where many raised beds succeed or fail. Cheap filler soil often compacts or drains poorly. You want a mix that stays fluffy, holds moisture, and feeds plants.
Step 6: Water, settle, and top up
After filling:
- water deeply
- let it settle
- top up with more mix if it drops several inches (it often will)
Quick build checklist
- Level site
- Assemble frame + braces
- Add hardware cloth + cardboard
- Fill with soil mix
- Water and top up
- Plant + mulch
Soil “Recipes” for Raised Vegetable Beds (Ingredient Tables)
A good soil mix gives you consistent results without constant troubleshooting.
Raised bed soil mix recipe (productive, flexible)
Soil Mix Recipe Table (by volume)
| Ingredient | Amount | Purpose | Notes |
|---|---|---|---|
| Finished compost | 30–40% | Nutrients + beneficial biology | Use weed-free, fully broken down compost |
| Screened topsoil | 40–50% | Structure and mineral content | Avoid heavy clay if possible |
| Aeration material (pumice, perlite, coarse coco coir, or aged bark fines) | 10–20% | Drainage + root oxygen | Increase in rainy climates; reduce in hot/dry areas |
How to tweak it for your garden
- If water sits too long, increase aeration material.
- If it dries too fast, add a little more compost and mulch heavily.
- If plants look pale mid-season, top-dress compost and consider a balanced organic fertilizer (follow label directions).
Optional: Simple compost tea for transplant support
Compost Tea Ingredients Table (small batch)
| Ingredient | Amount | Purpose |
|---|---|---|
| Finished compost or worm castings | 1–2 cups | Gentle microbial and nutrient boost |
| Water (ideally dechlorinated) | 1 gallon | Base |
| Unsulfured molasses (optional) | 1 tsp | Microbe food (use sparingly) |
Use it right away as a soil drench. Skip storing it—fresh is best.
Planting Plans for Any Garden Size (Spacing, Picks, and Layout)
You’ll get better results when you match crops to your bed size and use vertical space.
Best vegetables for raised beds
Reliable choices include:
- lettuce, spinach, arugula
- radishes and beets
- bush beans
- peppers
- tomatoes (especially with trellising)
- carrots (if depth is sufficient and soil is fluffy)
Easy layouts you can copy
2×4 bed (small but powerful)
- 1 tomato on the north/back side with a stake or trellis
- 3–4 basil plants near the tomato
- greens along the front edge in spring/fall
4×8 bed (great for a family bed)
- 2–3 trellised tomatoes along one long side
- peppers in the middle (space for airflow)
- alternating sections of carrots/onions and leafy greens
- quick crops (radishes) tucked into open spots
Trellising tips for higher yield (and less disease)
- Attach trellises to posts or corner supports, not thin side boards alone.
- Try cattle panels, sturdy stakes, or conduit arches.
- Keep leaves off the soil surface with pruning and mulching.
Keeping Raised Beds Productive for Years
Your raised bed is a living system. A little maintenance prevents big problems.
Seasonal maintenance checklist
Spring
- tighten screws and check braces
- add 1–2 inches of compost on top
- refresh mulch
Summer
- water consistently (raised beds dry faster than in-ground)
- tie up vines and prune for airflow
- scout pests weekly
Fall
- remove diseased plants (don’t compost disease)
- top-dress compost again
- plant a cover crop if you want winter protection
Winter
- keep soil covered (mulch or cover crop)
- avoid leaving bare soil exposed to rain and wind
Watering raised beds efficiently
If you want the simplest win for healthier plants, improve watering:
- drip lines or soaker hoses reduce waste and keep leaves drier
- mulch 2–3 inches deep stabilizes moisture and temperature
Common Mistakes When Making a Raised Garden Bed (Avoid These)
The biggest pitfalls
- Building the bed too wide to reach comfortably
- Skipping braces on long beds, leading to bowed sides
- Filling with low-quality “garden soil” that compacts
- Putting the bed in shade and expecting fruiting crops to thrive
- Forgetting rodent protection where pests are common
Troubleshooting quick guide
- Yellowing leaves: could be nutrient deficiency, overwatering, or compacted soil
- Mushy roots: drainage issue—reduce fine materials, avoid plastic liners
- Soil sinking: normal early on—top up with compost and mix
Cost Breakdown + Budget Options
A raised bed can be affordable, but soil volume adds up fast.
What usually costs the most
- lumber or metal panels
- bulk soil and compost (often the biggest expense)
- irrigation add-ons
Ways to save without building something flimsy
- Start with one bed and expand later.
- Buy soil in bulk rather than bags (often cheaper per volume).
- Use thicker boards or extra bracing so you’re not replacing parts early.
- Build shorter beds if you can’t brace long spans well.
FAQ: Making a Raised Garden Bed
How deep should you go when making a raised garden bed for vegetables?
Most vegetables do well in 12–18 inches of soil. If you’re growing deep-root crops (like carrots) or your native soil is poor, aim closer to 18–24 inches.
What’s the best wood for making a raised garden bed that lasts?
Cedar and redwood are top picks for rot resistance. If you’re using pine to save money, choose thicker boards, keep soil and mulch from staying pressed against the sides, and add bracing to prevent warping.
Is pressure-treated lumber safe when making a raised garden bed?
Modern treated wood is typically copper-based and widely used outdoors. If you want extra caution, line the inside with a permeable barrier or choose naturally rot-resistant wood. Check local Extension guidance for the most current local recommendations.
Can you make a raised garden bed on concrete or a patio?
Yes. Use an open-bottom bed design if possible (with drainage gaps), ensure water can escape, and plan for more frequent watering. A deeper bed helps buffer heat and drying.
What’s the best raised bed soil mix recipe?
A reliable mix is 40–50% topsoil, 30–40% compost, and 10–20% aeration material (like pumice or perlite). Then mulch heavily to keep moisture stable.
Conclusion: Build One Good Bed, Then Let It Feed You for Years
Making a raised garden bed is one of those projects that keeps paying you back. You get better soil, easier weeding, cleaner harvests, and a garden that fits your space—whether that’s a patio corner or a full backyard layout. When you plan the size carefully, brace the frame properly, and fill it with a soil mix that supports roots, your raised vegetable bed becomes a long-term growing space, not a seasonal experiment.
Call-to-action
If you’re ready to start, pick one bed size you can build this week—even a simple 2×4—and commit to building it sturdy. Then come back and tell me: What space are you working with, and what do you want to grow first? If you share your bed dimensions and climate, you’ll get a smarter planting plan and soil tweak suggestions tailored to your setup.